7 step guide to planning your DIY van conversion

Like most things in life, preparation is everything when it comes to making your DIY van conversion a reality. When looking at Instagram or YouTube it may seem like people make van life a reality fairly fast, but behind the scenes there is a lot of work that goes into preparing for the actuality of it all.
To give you a little insight into our journey, we started dreaming of what it would be like to live in a van about 5 years ago (we’ve been in the van one year now as I’m writing this) and it took us 3 years to even begin our build. We had a lot of doubts, fears, and questions come up, as I’m sure you do now.
How would we afford the van?
How would we afford the van build?
Where would we build it out?
How would we have enough time between work, regular errands, and everyday life?
What would we do with all our stuff?
How would we build out a van with no electrical, plumbing, or building experience whatsoever?
It took us a couple of years just watching other peoples’ YouTube channels to finally say “Let’s do it.” At the time we didn’t know the answers to our questions but we decided that step-by-step we would find a way. After making the decision to do it we put an action plan in place, identical to the one below. These 7 steps helped us get on the road within 2 years of that life-changing moment when we said “YES” to van life, officially.
If you feel unsure about where to start, use this guide as a framework for putting everything into place one step at a time. You don’t need a lot of money or to be an expert carpenter or electrician to build your own tiny home on wheels. There are a lot of resources available online which we have included below to help you take action.
This guide will help you begin the process of starting van life and you may go back and forth between each step as you pick a vehicle, get clear on the costs, and create your perfect layout. The biggest piece of advice we can give you is to get SUPER CLEAR on what your needs are versus what are the luxury items for your van build. Your choices will most likely shift as you start drawing up more specific plans and research everything. We probably re-designed our layout based on what would actually fit at least 10 times so be patient and have fun during the process. It will be worth it in the end!
We have created a simple and downloadable VAN BUILD CLARITY WORKSHEET to help you get clear on your costs and what is a need versus a luxury (items you would LOVE to have and will try to figure out where they can go after you have made sure your non-negotiables are taken care of).
DOWNLOAD YOUR VAN BUILD CLARITY WORKSHEET HERE
NOTE: While filling out this worksheet there may be items that are not easy to price because you may need various materials, like a shower, for instance. You can always guesstimate as you research and make notes of the supplies you will need to purchase for this and then add it up and write in the information later.
7 step guide to planning your DIY van build
Create your budget.
The #1 thing you need to do, whether you have as much money as Elon Musk or are living paycheck to paycheck, is creating a budget. Everyone has different financial needs and desires. What matters most is that you get clear on what works for you. Here are some questions to consider:
How much can you/do you want to spend on your van itself?
How much can you/do you want to spend on your van build?
Will you be able to put a large amount of money down on your van/van build items or will you be purchasing over time and as you are able?
Will you be able to move into a family or friends’ home while you build out your van to save money?
If finances seem to be the biggest roadblock for you, stay in a positive mindset and ask yourself if getting on the road is most important, or do you want to wait until you have more money saved before you build out your van? You can always build a simple van now and re-sell it later as you save more money for your dream van conversion. We’ve seen some incredible van builds for only a few thousand dollars so keep your ‘eyes on the prize’ and get clear about what kind of investment you are ready and willing to make now.

One of my, Crystal, biggest concerns was being able to drive the van comfortably and park without crashing into anyone. One of the reasons we purchased a Promaster was because of the rear-view camera that helps me reverse and park without having a panic attack.
2. Pick your vehicle.
While Promasters, Sprinters, and Transits seem to be the most popular on YouTube, there are a lot of other vehicles to choose from for your new tiny home. Besides your budget, consider the following questions:
Are you comfortable purchasing a used vehicle? If it is quite old, are you prepared for the possible renovations on the body before you start your build?
Do you prefer something new?
How tall are you? Will you be able to stand up in your van after insulation, a sub-floor, flooring, sub-ceiling, and ceiling is installed? These items can add on an extra few inches and you do not want to skimp on these.
How much gear will you be bringing? Is the size of the vehicle large enough for everything you need and/or want?
What is the gas mileage of the vehicle? Remember it will be less once you build out your van.
Is the van large enough to fit all your desired items? Eg: shower, workspace, bed, etc.
Do you plan to go off-road? Will you need a 4x4?
Do you prefer diesel? Does your country allow diesel vehicles?
What is the average cost of an oil change? How easy will it be to fix in another country, if you plan to ship out to a different country as you travel?
There are pros and cons to each kind of vehicle. Get clear on what is most important to you and what you are willing to compromise on as you explore your options.

If you are more tech-inclined you can use SketchUp to design a 3D layout of your van build and get a feel for what your dream will look like when it comes to life.
3. Design your van conversion layout.
Now that you have created your budget and chosen a vehicle, you want to start designing your layout. Taking time on this will be one of the most beneficial things you will do in this process.
You will need to use your VAN BUILD CLARITY WORKSHEET to design the van so you know what your final non-negotiables are and which items you would like to squeeze in if you can.
Make sure to think about the flow of your day and how that impacts your layout. While Instagram and Pinterest photos and YouTube videos can help you choose a look or vibe for your van, consider how YOU live most of all. Your life will inevitably shift a bit living in a tiny home but basic things like making coffee, brushing your teeth, making your bed, and things like that won’t change very much. It’s a small space so you want to make the most of your room and have it functional above all else.
Here are some things to consider as you design:
If you plan to work in your van, remember to put adequate outlets in the van. Do you like to work in bed? At a table? Or both? Put outlets where they are easy to access.
Where will you put your batteries, inverter, water tank (if using)? Do you want these to be easy to access?
If you plan to have a kitchen next to your bed, how will you prevent food ‘splatter’ from getting on your comforter?
What items do you use every day and want to access easily versus the items that you may not use as often and can be stored more deeply within the van or underneath other items? Build your cabinets to spec for the appliances or other items you are choosing to bring with you. Do NOT make this an afterthought because you will lose space!
How can you utilize your space so parts of your build are multifunctional?
Where will you place windows and your fan for maximum ventilation? We suggest having at least one window in the bedroom area so you can get a cool breeze at night during the summer months.
Where will you store your jackets and shoes?
If you will be living in your van with your partner consider these questions and scenarios:
How will you both get ready in the morning, or evening, at the same time?
Can one of you work on a laptop while the other cooks a meal? It may sound like an odd question but if you do not build enough counter space this can be a concern.
Are you OK working side-by-side or will you bump into each other?
Do you want privacy while you use the toilet? How will you separate the restroom from the rest of the van? RE: curtain, sliding door, etc.
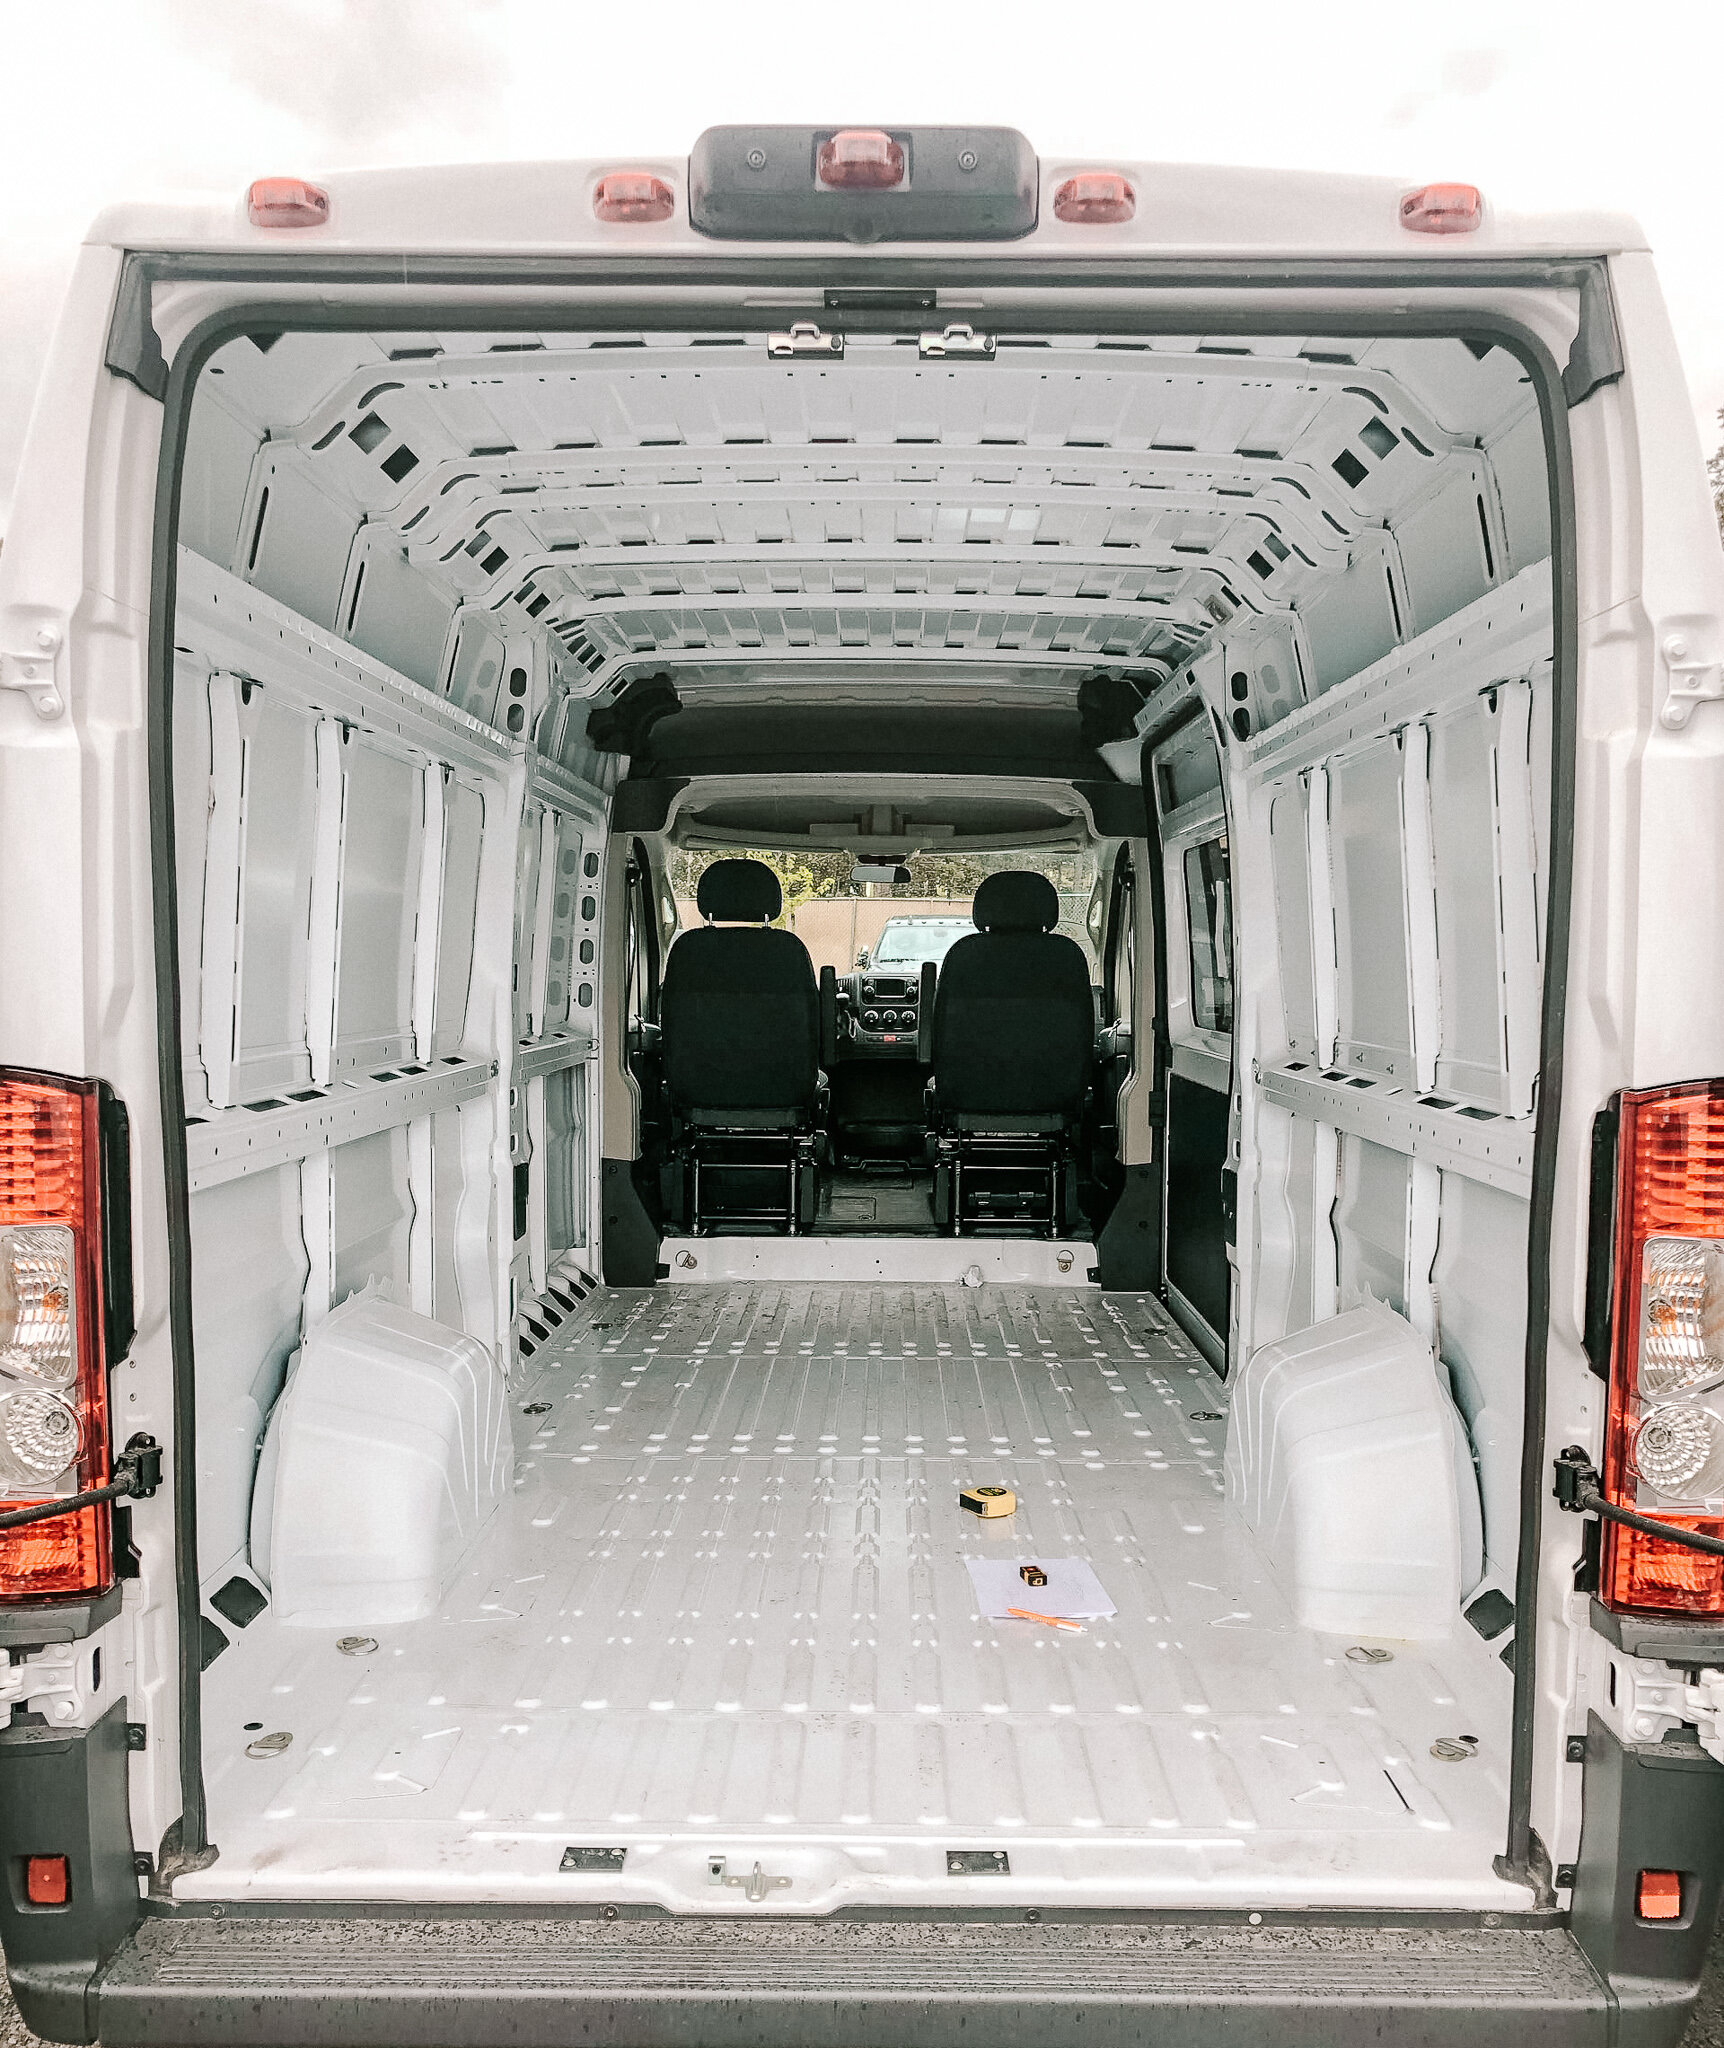
After you create a layout, start measuring everything to make sure it will really all fit. Measure the van and use tape to section off areas based on what you want.
We did this more times than we could count. In order to fit in our workstation and make it a doable design, we set up chairs and sat across from each other to see if both our legs would fit. We added cardboard boxes and pretended to live in the van and see what worked and what didn’t. We highly encourage you to do the same.
We’ll be making a video on common van build mistakes soon so look out for that video on our YT channel.
TIP: Have honest and open conversations with your partner about your expectations, needs, and desires from this experience before you hit the road or even start building your van. Living in a small space can be very trying and the build itself can also take a toll on the relationship if open communication is not part of the process.

You can see an outline of what became our work/extra bed/couch area in the van and the mess that is a van in the middle of a build out.
4. Calculate your energy usage.
Now that your van layout is functional, you need to make sure you have enough solar and energy to power all your appliances and equipment. This may change your layout slightly so be mindful that you may have to adjust your design a bit as you plan and prepare.
If the electrical aspect of your DIY conversion scares you, you just aren’t sure how to calculate your energy needs, or you just want to make sure what you are planning is going to work, we suggest using Explorist.Life. Their resources are PHENOMENAL. We honestly don’t know how we would have built our electrical system without their fillable calculators.
There are a lot of free resources on the website and you can also pay a small (and more than worth it!) monthly fee to ask questions and get support.
The Power Audit calculator was the biggest help for us.
You can easily input all the appliances into the worksheet and it will tell you how much energy you will need to power everything you plan on using in your van conversion.
This may also help you with your budget as you fill in the VAN BUILD CLARITY WORKSHEET. Based on what you want to bring you will be able to see if you can afford the amount of solar, batteries, and inverter you need to power everything.
You do not want to skimp on this step, especially if you plan to work full-time in a van. Laptops take up A LOT more power than we personally ever imagined and when you couple that with everything else that is on (Maxx air fan, fridge, etc.) it adds up to quite a bit.

Getting your van prepped with an adequate amount of power is essential if you plan to use electronics or work from the road.
5. Choose a location to build the van and store all your van build items.
You may not need to consider this step if you plan on building your van out at your house and have a garage or outdoor building space. If so, skip this and move on.
When building your van, remember that there will be a lot of moving parts: wood, solar panels, wires, a fridge, paint, stools, supplies, and more take up a lot of space. You will need storage and an area to work as well.
Reach out to community workspace areas, garages that rent out space, friends, and family if you aren’t sure where to build. There are also Facebook and Reddit Groups which you may ask around in - we’ve found that a lot of people want to help those looking to build out a van, RV, or Skoolie.
You may need to factor this into your budget as well so always refer back to your budget to ensure you can afford the workspace, van, and build.
TIP: Some people, like ourselves, are able to move into family members’ or friends’ houses temporarily after selling their belongings to save extra money to put towards the van build. Explore this option if your budget is tight. We were able to save $18,000 just by moving into my, Crystal’s, parent’s home.

One of two garages we used while at my parent’s house. We used one for painting and finished build items, like the cabinets above, and one just for tools, supplies, sanding, and miscellaneous needs. Things can get messy really fast!
6. Start ordering parts and shopping for items that are often out-of-stock or take longer for delivery.
If you are ordering some appliances that are quite popular, be sure to order them as soon as you can. We have listed a few items below that are often on back order or sold out:
Nature’s Head Compostable Toilet (the best toilet!)
Solar Panels
Roof Rack
Windows (CR Lawrence are very popular so we would order these first after you have finalized your layout)
Maxx Air Fan
Dometic Fridge
See if you can find pre-made, used, thrift, or vintage items that will fit your needs
This can be a great help if you are short on time or don’t want to build everything yourself. While we suggest building to suit as much as possible, you may still find some great cushions, cabinets, drawer pulls or other items that work perfectly for your aesthetic and/or are easy to modify. You may also check out Reddit or Facebook groups for used items to save a few dollars as well. Some people upgrade their van after a year or two and sell off their old solar panels or inverter as they make changes. Tools may also be used only briefly during a build and sold afterward. This can be a HUGE expense so look out for deals on tools!
Before you start building, we have one last bonus suggestion!
BONUS: Ask your friends and family for support.
We’ve found that a lot of people are excited to be part of the process and want to help out. Start asking yourself who of your friends has experience with carpentry, electrical, or plumbing work, or is just overall a very handy person. Even if you feel like you don’t know anyone that has the experience, it may be of help just to have another person around to be a sounding board and help you as you go.
We had about 10 people help us, all in their own unique way, and most of them had no experience with what we were doing but offered their ideas, time, and support. They sanded, helped us install our solar panels, worked on the framing, and were there to help problem-solve when we ran into issues. We honestly don't know how we would have done it without them and love that so many people we love took part in building our home.
Now you are ready to build.
Download your VAN BUILD CLARITY WORKSHEET now and start the process of turning your van life dreams into a reality.
Somewhere in the woods,

Did you enjoy this? Share it with your friends using our social links below!